Home Page |
TURNERTOYS FLIGHT CENTRAL
IMS Parlor Copter: Supplementary building instructions - 2Copyright 2010 Ed Loewenton - All Rights ReservedTHIS IS A BIG PAGE - PLEASE BE PATIENT WHILE IT LOADS Supplement Page 1 Dragonfly Directions (Page 4) DRAGONFLY Helicopter Directions |

|
|
|
[User Instruction Pages - Samples] |
|||
|
|
|||
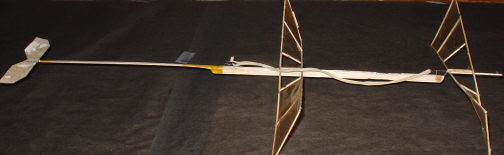
Suggestions for Assembling the IMS Parlor Copter - Page 2 -
Page 2 supersedes Page 1 in the event of a
contradiction.
|
||
|
|
||
|
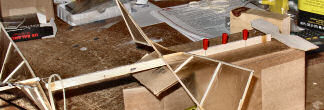
Jigging for assembly is easily done with grip pins, whatever is at hand, and
some creativity. The lower rotor is attached here. The motorstick and rotor are supported by a small box, with something inside it for weight. Do not stick pins through balsa parts of model. |
|
|
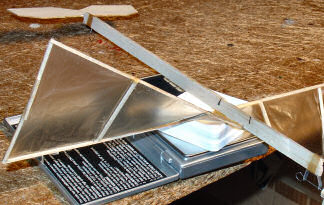
Weighing large assemblies on a small scale pan is done by putting a support on the scale and using the tare function. Balance the object to be weighed so that it touches only the support. | |
|
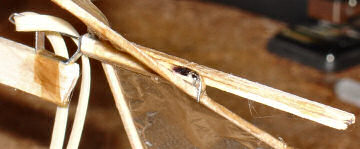
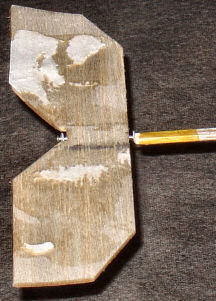
Make sure vane spins more freely than the results we initially got. We took our vane off the
tailboom, cleaned the wire with acetone, then applied some silicone spray lube, pushed it back through the vane channel
( 2 1/16" pieces with bevels glued together to form V-groove, enclosed
by vane - see P.1) and worked it to provide for some play in the channel until it moved freely, cleaned the
tailboom end with acetone, and
glued it into the tailboom.
Much better performance. We also used teflon bearings. At left: Pin was later installed between two 1/16 sticks used for tailboom, and reinforced with tissue. |
|
|
Winding is best done with a partner. Practise removing and re-installing the o-ring from the rear hook without winding. Best to feed the 0-ring directly onto the hook from the winder, NOT remove it with your hand. A slip after winding will destroy your model. Tip: don't call your partner a stooge, it reduces performance. |
||
|
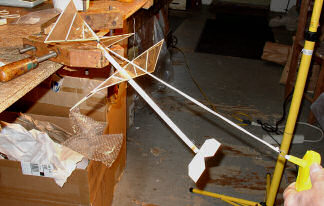
No partner? Here's one idea: a crude but effective winding stooge made from 2 small Jorgensen clamps with foam blocks applied to jaws with 2-sided tape. This is very tricky to use safely. Get a partner! On last winding, it was not tight enough. Copter popped out and shattered like glass. Lesson: do not lose control of the model or motor while winding! |
|
|
|
||